
On-Camera Tips for Bald Men: Video, Podcasts, and Presentations
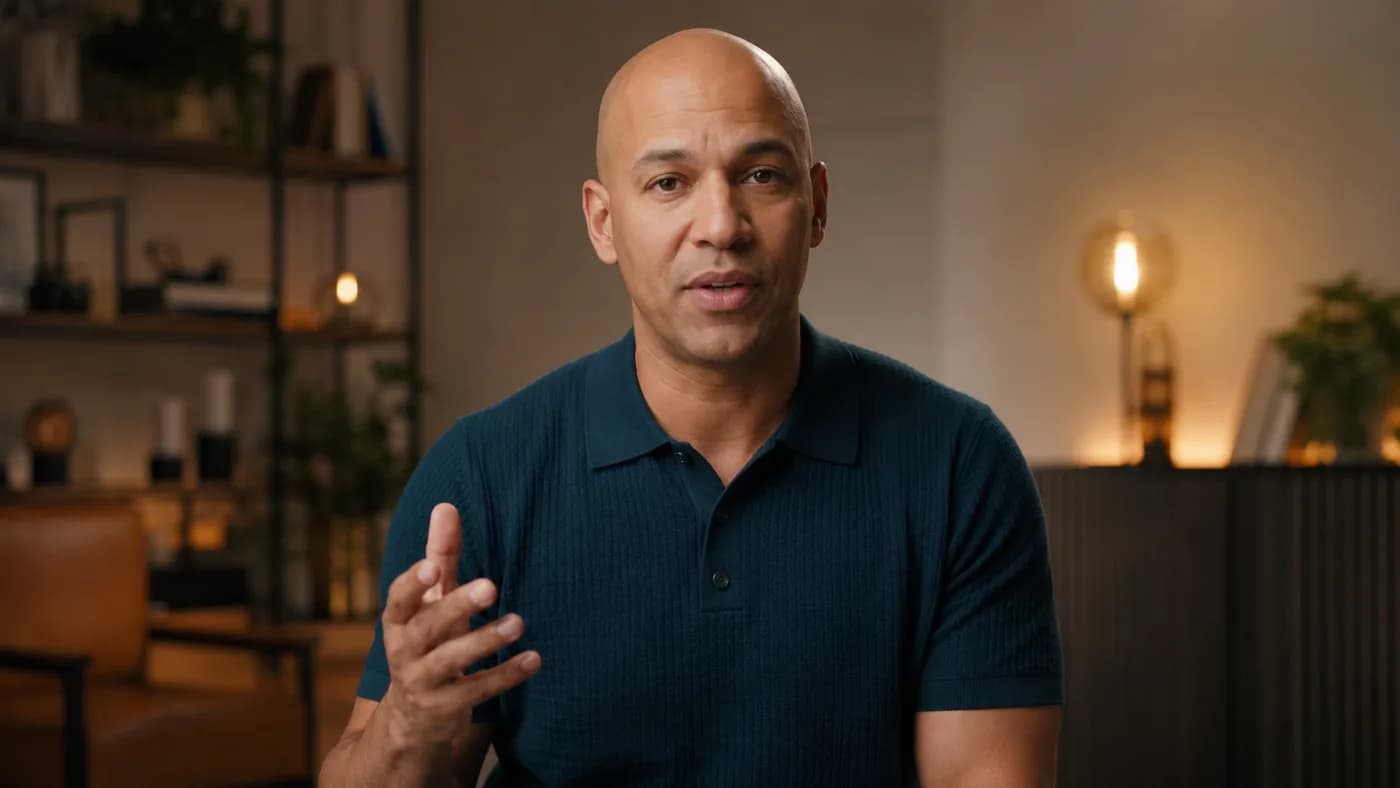
The best on-camera tips for bald men are less about hiding a shaved head and more about directing attention where it belongs: your eyes, expression, voice, and ideas. A smooth scalp can reflect a small, hard light more clearly than hair does. That is a setup problem, not a flaw to correct. With soft light, a considered shirt, a stable camera, and one short test recording, a bald presenter can look calm and unmistakably like himself.
This guide is for recorded video, reels, podcasts, webinars, and live presentations. Those situations move, change angle, and pick up sound—so they need a broader plan than a single headshot or an ordinary desk call.
Quick read
A bright scalp spot that changes when the light moves is usually a light-size or light-angle issue, not a reason to add more products.
Your shirt, beard, glasses, microphone, and background all share the same small rectangle on screen.
A ten-second clip while you speak and move exposes glare, fabric noise, framing, and background distractions that a mirror cannot.
Quick answer: how bald men can look better on camera
Put a broad, diffused key light near the camera, a little above eye level and slightly to one side. Turn down hard ceiling light, set the lens at eye level, and wear a matte, well-fitting solid or low-contrast textured top that does not blend into the background. Blot sweat or excess product before filming; only use a small amount of a familiar translucent product if your test footage shows it helps.
Then record a short clip—not just a still image. Speak, turn your head, glance at notes, and gesture. YouTube’s practical production guidance recommends avoiding strong backlight, keeping eyes in the upper third of the frame, and using a key, fill, and back light when the setup calls for it (YouTube production guide). The principle is useful even with one light: make your face readable first, then add complexity only when it improves the image.
Why moving video needs a different plan than a headshot or video call
A headshot is one chosen moment. A video call is usually a fairly stable, close desk frame. Recorded and live presentation work adds movement: you lean toward a microphone, turn to a guest, hold up a product, walk across a stage, or change from close-up to wide shot. The light can catch a different part of the scalp every time you move.
That is why the goal is a soft, forgiving setup, not a perfectly matte freeze-frame. A broad source creates a broader, gentler reflection. A small bare light makes a small, intense reflection. Use the same principle for glasses: move the light higher, farther away, or a little sideways before tilting your frames into an uncomfortable position. Adobe’s video guidance likewise suggests using a bounced fill or reflector to lift shadows rather than relying on a harsh direct source (Adobe Stock lighting tips).
For desk meetings specifically, continue with Video Call Lighting for Bald Men. For the still-photo version, see LinkedIn Headshots for Bald Men.
Build a bald-friendly camera setup in this order
1. Start with the key light, not the ring light
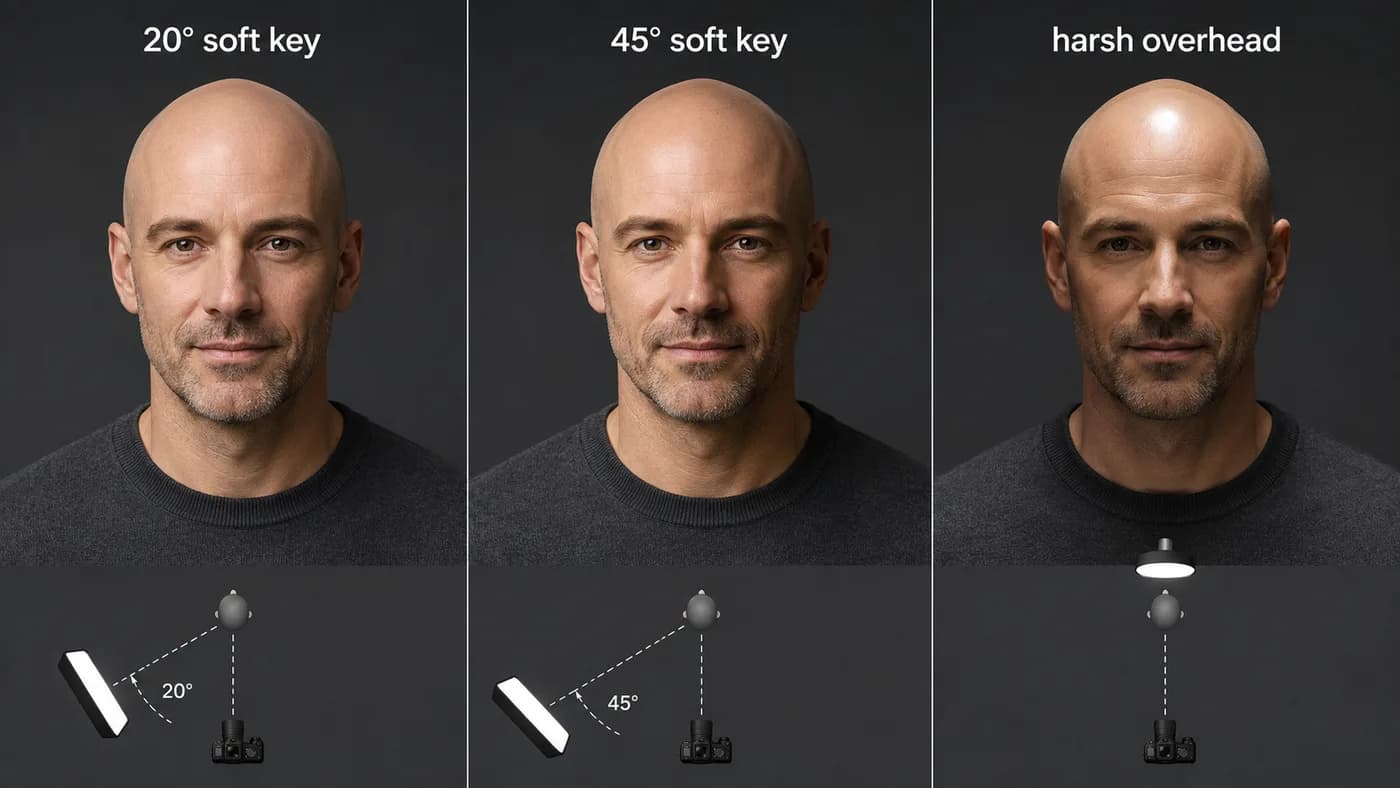
Place the main light near the camera, roughly 20 to 45 degrees to one side, and just above eye level. Make it large or diffuse it: a shaded window, softbox, diffusion panel, or bounced light all create a more forgiving source than a naked bulb. Start at low brightness and work upward. An overpowered light can flatten the face and turn a natural highlight into a bright patch.
Do not assume you need three lights. One soft key is enough for most reels, webcam recordings, and simple interviews. Add a gentle fill only when one side of the face falls away too much; add a subtle back or background light only when you need separation from a dark background. YouTube’s three-point-lighting recommendation is a useful expandable model, not a rule that every home setup must buy (YouTube production guide).
A scalp highlight is not automatically a problem
Natural skin reflects light. Aim to avoid a tiny, pure-white hotspot or a reflection that competes with your eyes—not to erase all dimension from your head. If the highlight travels softly as you turn, your setup is usually doing its job.
2. Set a camera angle you can hold naturally
Put the lens at eye level or slightly above. Frame from mid-chest or upper torso with a little space above your head; this gives you room to gesture and makes the head shape feel intentional rather than tightly cropped. Avoid placing a phone or laptop low on the desk, which exaggerates the underside of the chin and makes you look as if you are addressing the ceiling.
For a phone reel, look at the lens rather than your own preview when delivering the key line. For podcasts and interviews, a slight three-quarter angle can be more conversational than an unbroken straight-on stare. Lock exposure and focus when your device allows it, then test your most animated movement. A great seated pose is not enough if the image shifts or blows out when you make a point.
3. Choose clothing with camera behavior in mind
The right top gives the face a quiet frame. Start with a solid color or a subtle texture, then check it on the actual camera. Very tight stripes, small checks, shiny synthetics, and large high-contrast logos can shimmer, distract, or compete with the face as you move. Pure white near a bright key light can dominate exposure; deep black can lose its shape against a dark set.
Useful starting directions include navy, medium blue, forest or olive green, burgundy, charcoal, stone, or a warm neutral. They are not universal color rules. Your beard color, skin tone, glasses, set color, and camera all change the outcome. The better choice is the one that keeps your face readable and separates you from the background. Clothing Colors for Bald Men explains how to run that contrast test, while Business Casual for Bald Men has work-ready formulas.
Collars and necklines matter too. A crew neck feels simple for short-form video; a knit polo or open collar adds structure for webinar hosts; a shirt collar or jacket can suit a formal presentation when it matches the room. Make sure the garment still sits cleanly when you clip a mic or turn your head.
4. Use blotting and powder as optional finishing tools
Before filming, use a clean tissue or blotting paper to remove sweat or excess sunscreen/product shine. That is often all you need. If you already use a translucent, camera-appropriate powder and it looks natural on your skin, apply the lightest amount after skincare has settled and check it under your actual key light. Test around the temples and scalp line rather than treating the whole head as a canvas.
Powder is not medically necessary, and it is not a substitute for changing a harsh lamp. Too much can look flat, chalky, or uneven as you move. A comfortable scalp routine comes first; Bald Head Shine: Natural, Matte, or Polished? can help distinguish product-created shine from ordinary reflection, and Bald Head Care Routine covers the everyday basics.
5. Clear the background and test glasses and sound together
A background should support the subject, not become a scavenger hunt. Choose a plain wall, an ordered shelf, a little depth behind you, or a location connected to the topic. Remove bright windows, clutter, and objects that appear to grow from your head. If you wear glasses, clean them and do a head-turn test; a reflection that only appears when you look up is a cue to move the light, not to force an unnatural pose.
Microphones are part of the visual frame. A lavalier frees your hands and can disappear on camera, but test for cable and fabric rub. Shure notes that lavaliers can keep a talker’s hands free and may be concealed around a collar or under clothing, while placement and clothing noise need attention (Shure’s video and film audio guide). A visible podcast mic can look purposeful when it sits just below the mouth line instead of blocking your face. On a stage, use the real microphone, real shirt, and real room for a sound check; movement and breath can change the result.
Match the setup to the kind of appearance
| Situation | Frame and light | Clothing and grooming | Audio and movement |
|---|---|---|---|
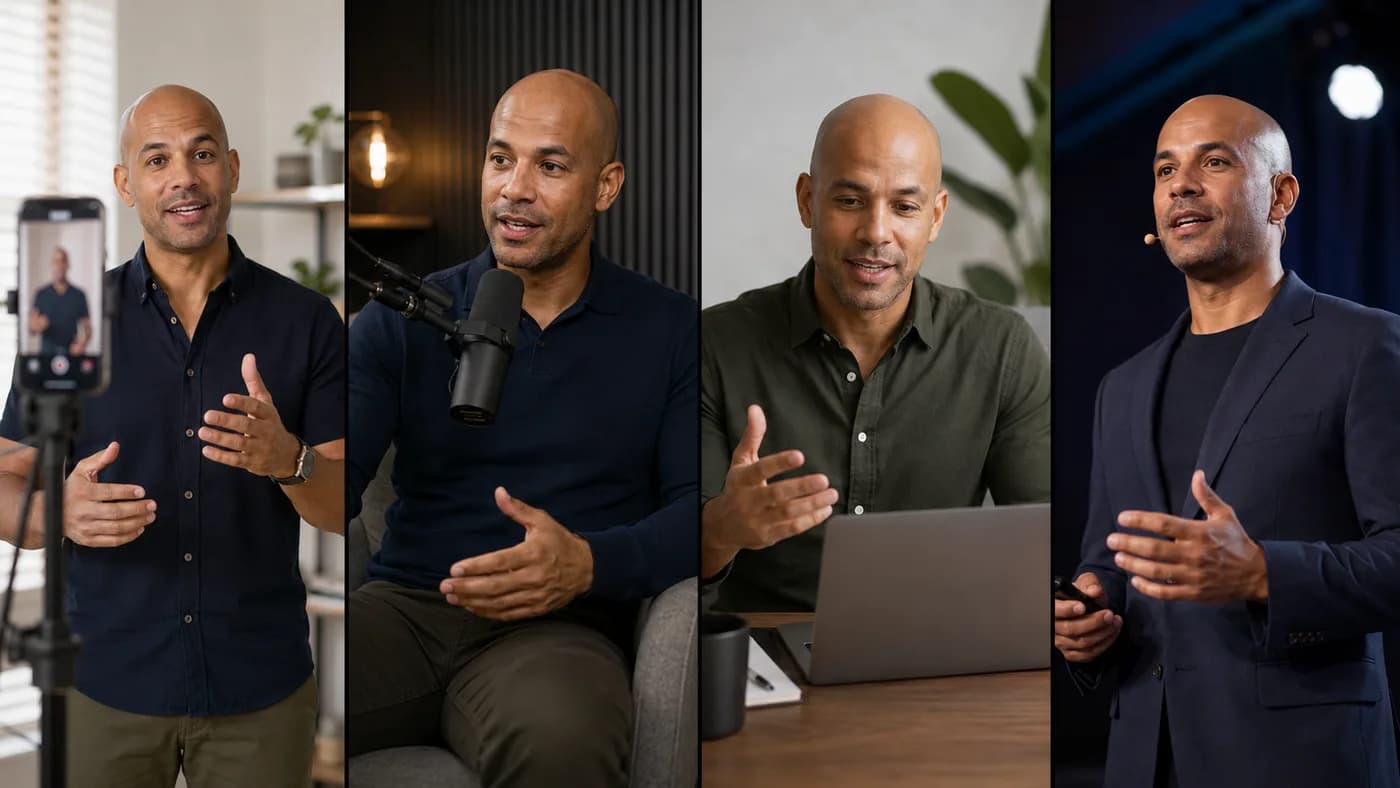
| Short-form video or reels | Vertical, eye-level close-to-medium frame; one soft light near the phone | Solid or subtle texture; blot before each batch; keep a clear neckline | Use a lav or close off-camera mic; leave room for natural gestures |
| Seated podcast | Medium shot or three-quarter angle; soft key plus calm background depth | Matte shirt or knit; test glasses and beard line from both angles | Keep boom mic just out of the face or embrace it in frame; check chair and shirt noise |
| Webinar or training | Stable chest-up frame; controlled front light and uncluttered background | Slightly more structure: knit polo, open collar, or jacket that fits your role | Use a reliable close mic; test screen sharing, notes, and turning to the second monitor |
| Stage presentation | Light for the venue, not a home studio; request a rehearsal look if possible | Choose a color that separates from the backdrop; avoid tiny patterns | Confirm handheld, headset, or lav placement; practice walking, turning, and holding a clicker |
A concise pre-recording checklist
Run this five minutes before you record, go live, or walk on stage. It protects the result without turning preparation into a ritual.
Test the look before recording day
One mirror view cannot show you a stage angle, a studio background, or how a collar and beard look in a moving frame. BaldLooks Free Analysis gives you a bald-look report from one photo. With a paid BaldLooks plan, you can explore studio, office, and stage-ready versions of your bald look across outfits, beard choices, locations, and angles before you plan your next recording.
The practical takeaway
Your on-camera goal is not to make a bald head disappear. It is to make the image easy to watch. Start with one soft light near the lens, a calm shirt that separates from the set, an eye-level camera, and a short test clip with your exact microphone. Make the simple corrections first: move the lamp, clean the lenses, blot excess shine, remove a distracting object, or change the shirt that fights the background.
When the setup feels calm, you can focus on the actual work: explaining the idea, listening to the guest, or connecting with the audience. For photo-specific preparation, continue with Bald Men’s Photo Guide; for a repeatable professional identity, read Personal Branding for Bald Men.